Create Your Own Custom-Painted Stools, In A Few Easy Steps
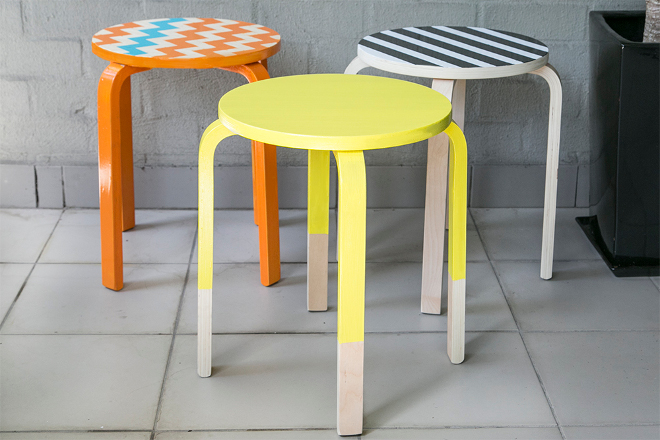
Neon, stripes or chevron? The choice is yours, the instructions are ours, the stools are those super cheap IKEA ones.

Upper Crust your life with
To celebrate the launch of their new, sensational Upper Crust pizzas, we’ve teamed up with Crust Pizza to show you some simple, cheap and smart ways to Upper Crust your life!
–
If any of your New Year’s resolutions involved a) saving money, b) being more creative, or c) visiting IKEA more often, then it’s your lucky day! We asked the crafty Kat White to show us how to customise some cheap $15 IKEA stools, so you can make your house look a bit more like something from Pinterest.
–
CUSTOM-PAINTED STOOLS!
MATERIALS:
– Assembled IKEA Frosta stool
– Water-based gloss paint (white bases will give you better coverage, and will help avoid paint bleed)
– Paint brushes (50mm and 25mm)
– 3M Scotch 25mm painter’s tape
– Sandpaper (fine)
– Retractable blade knife
– Ruler
– Lead pencil
– Newspaper or drop sheet

–
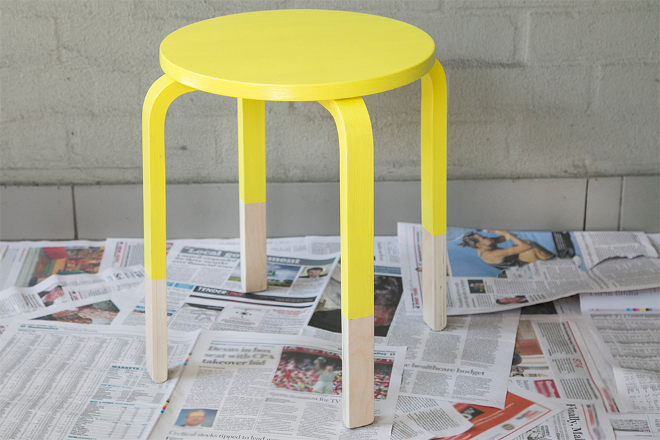
After Some Neon Legs?
1. Using a pencil, mark a point 15cm from the bottom of each chair leg. Wrap painter’s tape around each leg, positioning the top of the tape with the pencil markings. Then grab some half-pages of newspaper and wrap them around the areas below the tape.
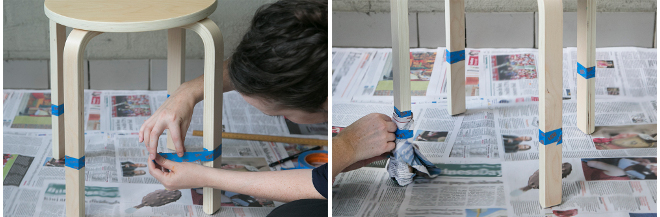
2. Place the stool upside down and paint its underside — including the legs — with the neon yellow paint. Avoid getting paint over the edge of the stool! Apply lightly, but with as much coverage as possible. Allow it to dry for the recommended time, then re-coat 2-3 times.

3. Once dry, position the stool right side up. Making sure your brush doesn’t have too much paint on it, paint the rim of the stool top. Pay extra attention to it not dripping; you may need to use a smaller brush for this. Then paint the top of the stool in smooth and even strokes, using a medium-sized brush. Allow it to dry for the recommended time, then re-coat 2-3 times.

4. Peel off the newspaper and painter’s tape from the stool’s legs. If the paint has bled, sand the affected area gently with sandpaper until the paint’s gone, making sure that you don’t damage the main area.
–
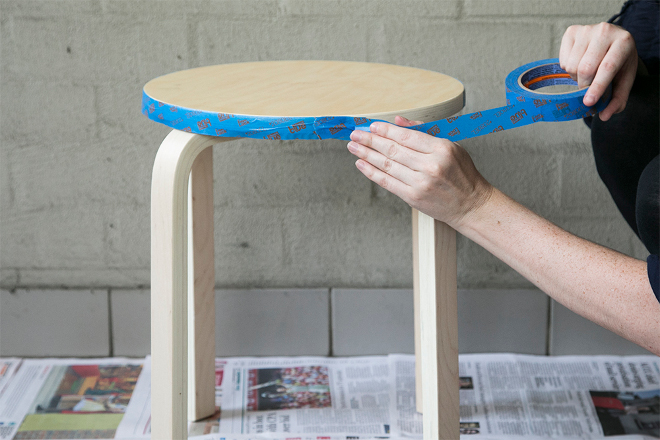
Would You Like Stripes With That?
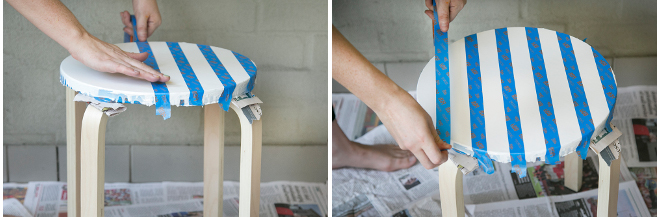
1. Apply the painter’s tape to the rim of the stool top. Wedge some folded-up newspaper between the legs and the seat to stop paint dripping onto the legs.
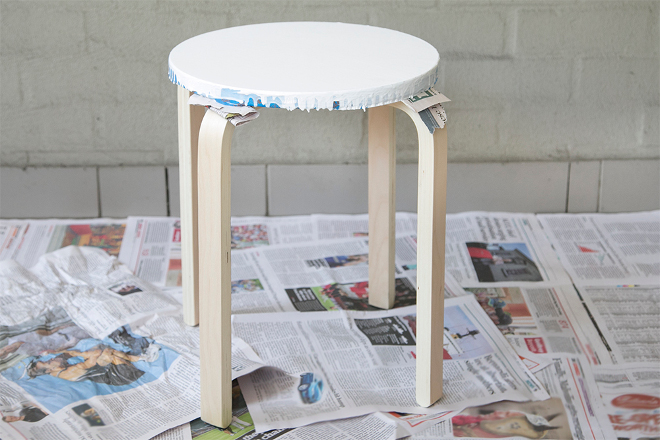
2. Paint the top of the stool with white paint in smooth and even strokes using a medium-sized brush. Allow it to dry for the recommended time, then re-coat 2-3 times.
3. Once dry, apply the painter’s tape to the stool top. Line it up with the edge of the top, and make sure that the tape is long enough to hang over the edge. Continue to apply the tape with even space between each piece.
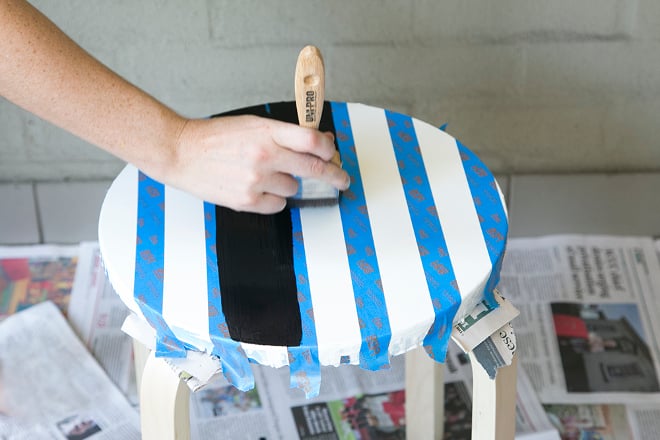
4. Using a medium-sized brush, paint the top of the stool using the black paint in smooth and even strokes. It’s okay to paint over the tape! Re-coat 2-3 times.
5. Once dry, remove the stripey painter’s tape gently, making sure that you don’t peel off any paint. Once it’s all off, proceed to remove the tape from the rim, too.
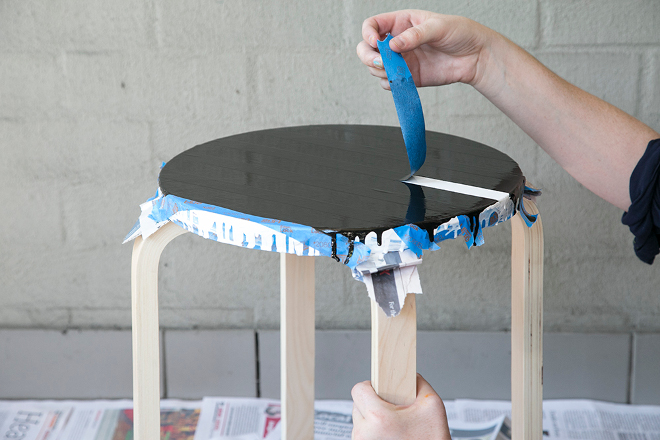
6. If any paint has bled onto the unpainted rim, gently remove it with sandpaper.

–
Or Would You Prefer Chevron?
1. Add painter’s tape to the rim of the stool, and then cross-ways across the top to create a chequered effect as pictured.

2. Wedge some folded up newspaper between the legs and the seat to stop paint dripping onto the legs.

3. Using a retractable blade knife, gently cut away the pieces of tape that don’t belong (note: the negative space should form the chevron pattern).
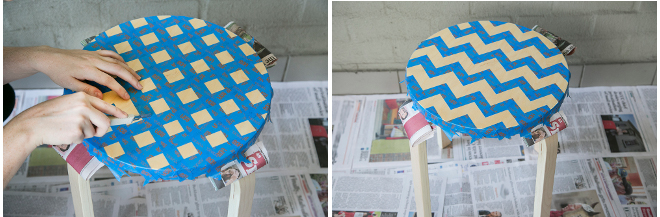
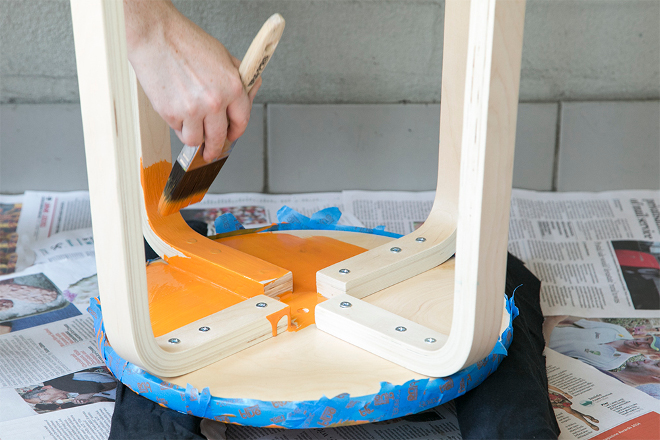
4. Once you’ve finished creating the chevron pattern, paint four out of five of the exposed rows using orange paint, using smooth and even strokes and a small-sized brush. Re-coat 2-3 times.

5. Once dry, paint the remaining chevron row with the blue paint, once again using smooth and even strokes and a small-sized brush. Make sure you don’t paint outside of the tape! Re-coat the section 2-3 times.

6. Allow the top of the stool to dry completely, then turn the stool upside down and paint its underside — including the legs — with orange paint. Re-coat 2-3 times.
7. Remove the stripey painter’s tape gently, making sure that you don’t peel off any paint. Once it’s all off, proceed to remove the tape from the rim.
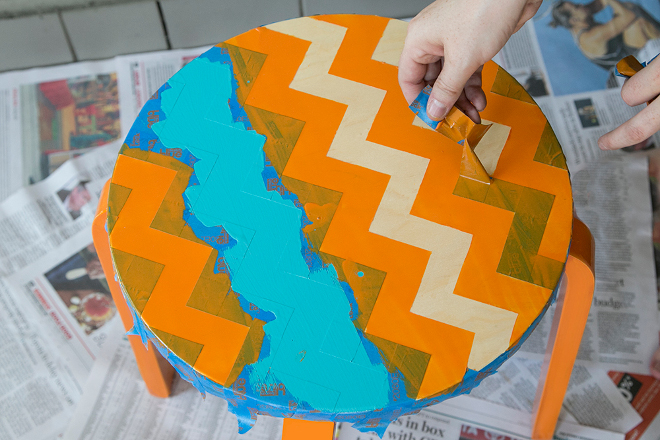
8. If any paint has bled onto the unpainted chevron gaps, gently remove it with sandpaper.
9. Now comes the tricky part — painting the rim! With a small brush, gently paint around the rim of the stool top. Make sure you don’t have too much paint on your brush to avoid dripping. Allow it to dry for the recommended time, and then re-coat 2-3 times.
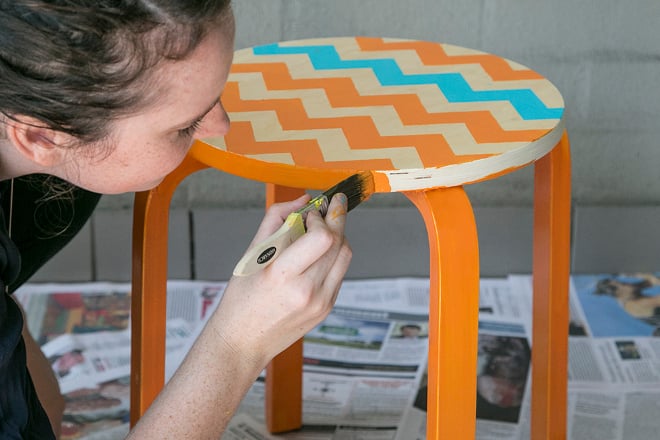
10. Stare proudly at what you did, and then sit!
–
Kat White works as a graphic designer at SBS by day, and is a photographer and artist. You can buy her work online here, and tweet at her here.
–
Photography by Natasha Mulhall